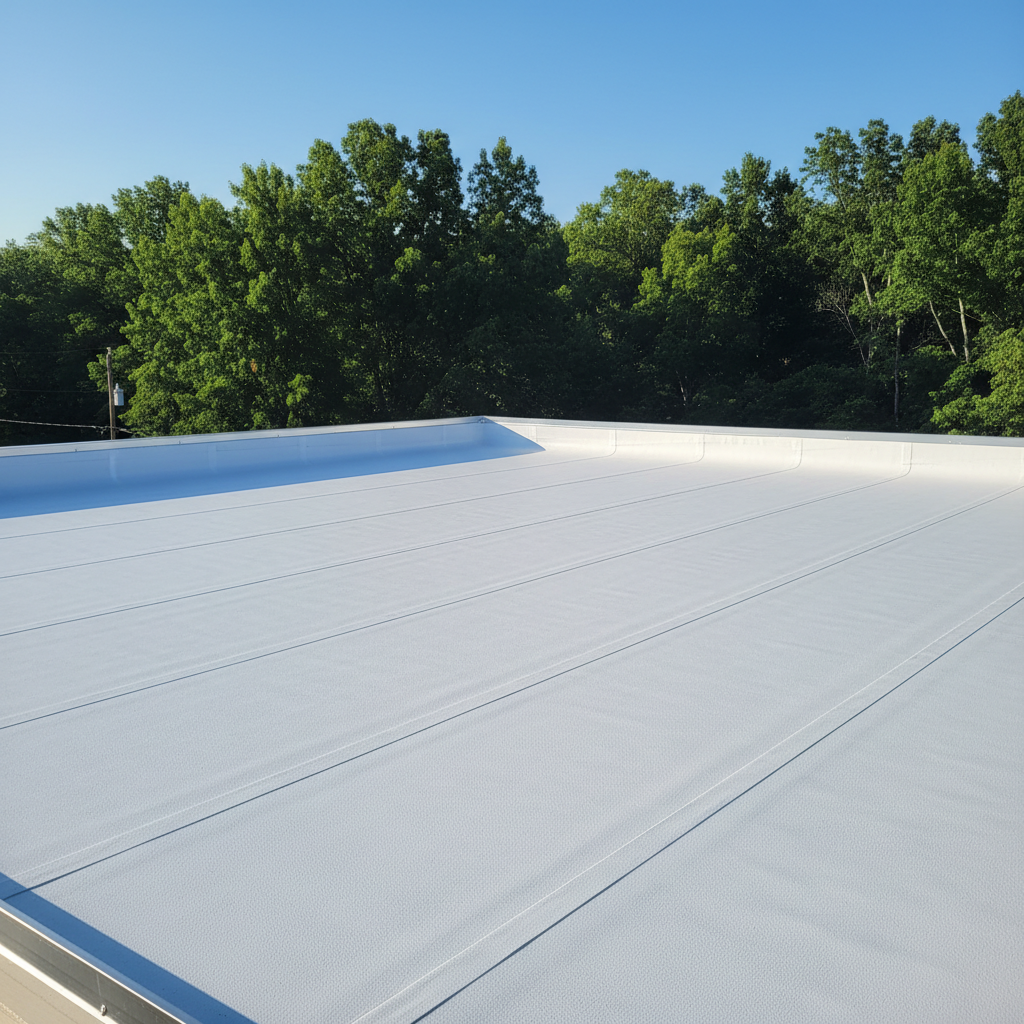
TPO roofing isn't just for big commercial buildings anymore. More and more folks around Louisburg are looking at it for their homes, especially if they've got a low-slope or flat roof section. It's tough, energy-efficient, and can be a really smart choice. But like any big project, you need to know what you're getting into. I'm going to break down what you need to understand before, during, and after a TPO roof installation.
Before the Project: Getting Ready
First off, is TPO even right for your roof? It's primarily for low-slope or flat roofs, you see. If your roof has a steep pitch, like most traditional homes in, say, the Lake Royale area, TPO probably isn't the best fit. You'd be looking at shingles or metal in that case. But for a garage, an addition, a porch roof, or a small commercial building downtown, TPO can be excellent.
You'll definitely want to get a few quotes. Don't just go with the first guy who comes along. A good contractor, like us at Charis Roofing Solutions, will come out, inspect your current roof, and give you an honest assessment. They'll look at the decking, insulation needs, and drainage. Drainage is huge with flat roofs – you absolutely don't want standing water pooling up there. We've seen plenty of old flat roofs around here that just weren't designed for proper water flow, and that's a recipe for trouble down the road.
Here's what you can realistically do yourself before a pro gets involved:
- Clear the area: Move any patio furniture, grills, or potted plants away from the house.
- Trim back bushes/trees: If you've got branches hanging over the roof, get 'em trimmed. It makes access easier and safer for the crew, trust me.
- Check your paperwork: Dig out any old roof permits or plans if you happen to have them. It might give the contractor a head start on understanding the structure.
What you absolutely shouldn't do yourself? Trying to patch a TPO roof with tar or caulk. TPO is a membrane system, and it needs specific materials and techniques for repair. You'll just make a bigger mess for the pros to fix, honestly.
During the Project: What to Expect
A TPO installation is a pretty involved process. It's not like slapping on a few shingles, that's for sure. Here's a quick rundown of the steps:
- Tear-off: The old roof comes off. This can be noisy and messy, so make sure your contractor has a plan for debris removal.
- Deck inspection and repair: Once the old stuff is gone, the decking is exposed. Any rotten or damaged wood needs to be replaced. This is critical for a solid foundation.
- Insulation and vapor barrier: Often, new insulation boards are laid down, sometimes with a vapor barrier, especially in our humid North Carolina climate. This helps with energy efficiency and prevents moisture issues.
- TPO membrane installation: The TPO sheets are rolled out. They're typically mechanically fastened (screwed down with plates) or fully adhered (glued) to the insulation.
- Seaming: This is where the magic happens. The seams between the TPO sheets are hot-air welded together. This creates a monolithic, waterproof barrier. This step requires specialized equipment and trained technicians – definitely not a DIY job.
- Flashing and details: All the edges, penetrations (like vents or pipes), and parapet walls need to be properly flashed and sealed with TPO accessories. This is where a lot of leaks happen if not done right.
You'll hear some noise, especially during the tear-off and when they're using the hot-air welders. There might be some smells from adhesives if they're using a fully adhered system. Keep pets and kids clear of the work area, and make sure your contractor has good safety protocols in place.
After the Project: Maintenance and Care
Once your new TPO roof is on, it's pretty low maintenance, but not *no* maintenance. Here's what you need to keep an eye on:
- Regular inspections: Twice a year, or after any major storm, take a look at your roof from the ground if you can. If you have safe access, get up there and check for debris, standing water, or any obvious damage.
- Keep it clean: Leaves, branches, and dirt can build up, especially in corners or around drains. This can block water flow. Clear off any debris. You can gently wash the surface with a mild detergent and a soft brush if it gets really dirty, but avoid harsh chemicals or pressure washers.
- Check drains and scuppers: Make sure they're clear of obstructions. Good drainage is key to a long-lasting TPO roof.
- Look for punctures or tears: If you see any, call a professional right away. Small punctures can turn into big leaks fast, and you don't want that. Don't try to patch it yourself with tape or tar.
TPO roofs are durable, but they're not indestructible. A well-installed and properly maintained TPO roof can easily last 20-30 years, giving you peace of mind for a long time. Just remember, the quality of the installation makes all the difference, so pick your contractor wisely.